Create an Image Tween Animation
Have you ever thought about directly change one image to another in your Flash movies, like a magician giving performance on the stage? Now I can tell you that the Sothink SWF Quicker V3.0 will help you to realize your dream.
Series: SWF Quicker 3.0
Estimated Time of Completion: 45 minutes
Description: In this course, you'll mainly learn how to create image tween animations, however, the functions like creating motion tween animations, adding texts and creating fade in/out effects are also involved.
Prepare:
1. Click imagetween.zip (42.9 KB) to download the images required in this tutorial, and extract them to a local folder named as imagetween.
2. Launch Sothink SWF Quicker and new a blank document.
Step One: Create image tween animation – Change a goat to a giraffe
1. In Properties panel, set Width to 470, and set Height to 212.
2. In timeline, rename "Layer1" to "image". Then add a new layer and name it as "background".
3. In frame 1 of the "background" layer, import the background.png from the imagetween folder, and set its X, Y values to 235,105.5 from the Transform panel. In frame 90, press F6 to insert a keyframe.
4. In frame 1 of "image" layer, import the pic_1.jpg from the imagetween folder. From the Transform panel, set X, Y values of this image to 175,105.
5. In frame 15 of "image" layer, insert a blank keyframe and import pic_2.jpg to this frame. Set its X, Y values to 175,105.

6. Right click any frame between frame 1 and 15 of the "image" layer, and choose Create Image Tween from the context menu. Now this image tween animation of changing a goat to a giraffe is almost completed. You can click the preview button to see the effect.
7. After previewing the effect, you may find that the transform process is a little rough, so you should take more time to configure the effect to be more exquisite.
8. Click any frame between frame 1 and 15 of the "image" layer, and click Configure the Tween… in the Properties panel to open the Image Tween Editor dialog box.
9. In the Image Tween Editor dialog box, click to add hint points in the Source window. And adjust positions for corresponding hint points appeared in the Destination window.
10. Finally, click OK to save the transform process. Now you can click preview button to see the goat changes to a giraffe.
Tips:
1) The more hint points you added, the more exquisite the transform process will be.
2) To judge whether the hint points are added correctly and efficiently, you can see that if the image in the Preview window become clearer and clearer.
3) Right click a hint point may delete it.
Step Two: Create image tween animation – Change a giraffe to a lion
1. In frame 18 of the "image" layer, press F6 to insert a keyframe. So the second image will be remained for a while before changing to a lion, which will make your animation to be visually smooth.
2. In frame 27 of the same layer, press F5 to insert a blank keyframe, and import the pic_3.jpg from the imagetween folder. From the Transform panel, set X, Y values of this image to 175,105.
3. Right click any frame between frame 18 and 27, and choose Create Image Tween from the context menu. Now this image tween animation of changing a giraffe to a lion is almost completed. You can click the preview button to see the effect.

4. To further configure the transform process, please refer to step one for details.
5. Finally, click OK to save the transform process. Now you can click preview button to see the giraffe changes to a lion.
Step Three: The lion is faded out
1. In frame 30 of the "image" layer, press F6 to insert a keyframe. So the third image will be remained for a while before fading out, which will make your animation to be visually smooth.
2. Press F6 in frame 45 to insert a keyframe.
3. In frame 45, choose the Selection tool from the Tools panel, and then click to select the pic_3.jpg on the stage. Go to the Transform panel, select Alpha from the Color transform drop down list, and set alpha value to 70%.
4. Right click any frame between frame 30 and 45, and choose Create Motion Tween from the context menu.
5. Press F6 to insert a keyframe in frame 90 where the movie is planned to be ended.
Step Four: Adding question marks
1. Add two layers in timeline and respectively name them as "questionmark1" and "questionmark2".
2. In frame 35 of the "questionmark1" layer, press F6 to insert a keyframe. Choose Text tool from the Tools panel, and then go to the Properties panel, set font type to Arial, font size to 30, font color to white, and choose Bold. Finally, drag a rectangle box on the stage and input a "?" sign. Adjust the "?" to appropriately locate on the lion's nose, and drag the center point of the "?" to its center.
3. In frame 42 of the "questionmark1" layer, press F6 to insert a keyframe. Choose Transform tool from the Tools panel, click to select the "?" on the stage, and scale it to a larger size.
4. Right click any frame between frame 35 and frame 42 and choose Create Motion Tween from the context menu. Then go to the Properties panel, Set Rotate to CCW and Times to 5. Press F6 in frame 90 to add a keyframe. Now the first question mark is completed.
5. In frame 45 of the "questionmark2" layer, press F6 to insert a keyframe. Copy the "?" sign in frame 42 of the "questionmark1" layer, and paste it to the same position in frame 45 of the "questionmark2" layer by choosing "Paste in Place" option.
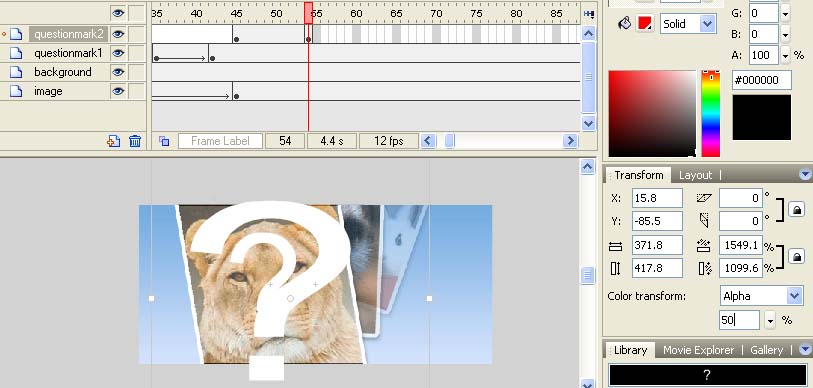
6. Press F6 to insert a keyframe in frame 54 of the "questionmark2" layer, and scale the "?" on the stage to a larger size. Then go to the Transform panel, select Alpha from the Color transform drop down list, and set alpha value to 50%.

7. Right click any frame between frame 45 and frame 54 of the "questionmark2" layer and choose Create Motion Tween.
Step Five: Adding texts
1. Add two layers in timeline and respectively name them as "text1" and "text2".
2. Press F6 in frame 45 of the "text1" layer. Choose Text tool from the Tools panel, then go to the Properties panel, set font type to Arial, font size to 20, font color to white, and choose bold.
3. Drag a rectangle box on the stage and input "What's the next?". Set X, Y values of the text to 119, 181 from the Transform panel. Select Alpha from the Color transform drop down list, and set alpha value to 30%.
4. Press F6 to insert a keyframe in frame 54. Select the text on the stage and set its alpha value to 100%. Right click any frame between frame 45 and frame 54 and choose Create Motion Tween.
5. Press F6 to insert a keyframe in frame 90. Now the text 1 is completed.
6. Go to frame 1 of "text2" layer, Choose Text tool from the Tools panel, then go to the Properties panel, set font type to Century Gothic, font size to 18, and choose bold.
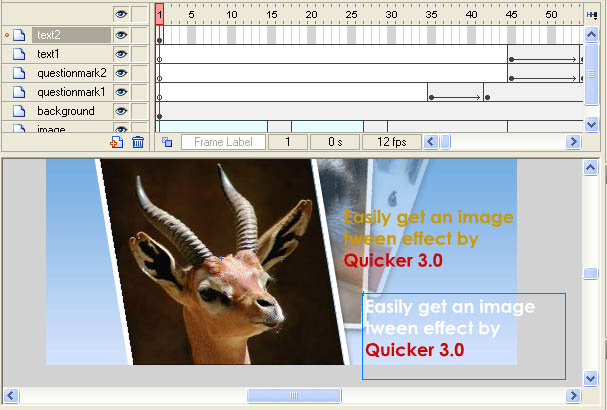
7. Drag a rectangle box on the stage and input "Easily get an image tween effect by Quicker 3.0". Choose "Easily get an image tween effect by" and set its color to #CC9900 from the Properties panel; Choose "Quicker 3.0" and set its color to #CC0000.
8. Name this text symbol as "bottom" and set its X, Y values to 290, 50.
9. Duplicate the "bottom" symbol in the Library and name the new one as "top".
10. Choose frame 1 of the "text2" layer, drag the "top" symbol to the stage.
11. Choose the Text tool, and then click to choose "Easily get an image tween effect by" in "top" symbol, go to the Properties panel, set color of the selected texts to white.

12. Set X, Y values of the "top" symbol to 289, 49.5.
13. Press F6 to insert a keyframe in frame 90 of "text2" layer.
That’s the end. Click preview button to see your artwork.

